Warning: This is my first tutorial. Ever. Please let me know if you find any errors or have suggestions or comments. These instructions make one 8 1/2" square.
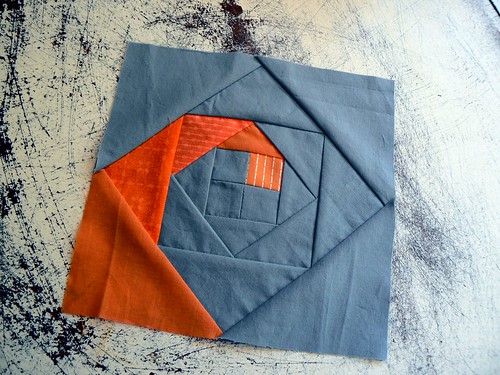
Snail's Trail
Materials:
Small scraps for the colored swirl
1/4 yard of grey
Cut:
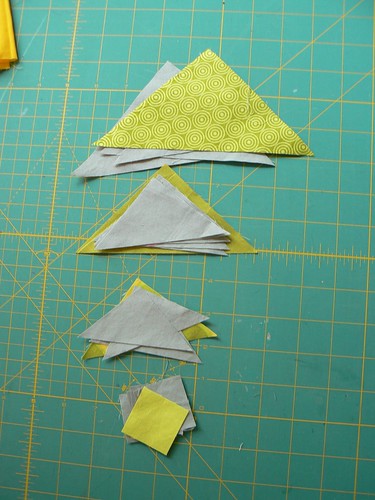
Inner Squares ~ 1 1/2" {cut 1 orange and 3 grey}
Round One ~ {cut 1 orange and 2 grey squares 2 1/2 "}
Round Two ~ {cut 1 orange and 2 grey squares 3"}
Round Three ~ { cut 1 orange and 2 grey squares 4"}
Round Four ~ {cut 1 orange and 2 grey squares 5"}
For
round one through four squares cut each square in half to make
half-square triangles. Do not cut the four 1 1/2" inner squares. You
will end up with one extra (insert your color here) and grey triangle.
All seams are 1/4".
Start
by sewing one orange square and one grey square together. Then sew two
grey squares together. Press seams to one side and pin sets together. *Note: this is really the only time I pinned anything on this block. Feel free to place pins to your heart's content but I didn't find it necessary.*
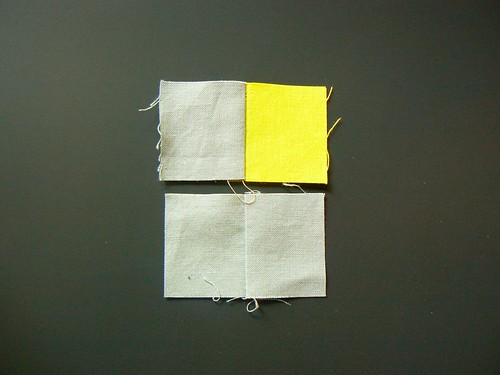


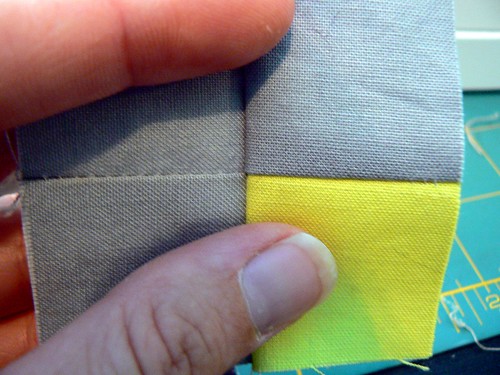
To get the center seam perfectly aligned (usually) I iron the seams to opposite sides and line up the center seam like so:
Then I rub my forefinger and thumb together until the seams sort of "click".
I end up with this:
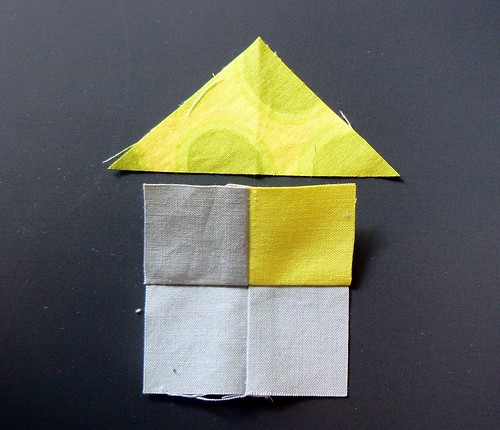
Round 1:
Begin by sewing the first (smallest) colored triangle onto the top of the 4 x 4 square. The top contains the colored square (green in my case), which is on the right.
So your first triangle of round 1 should look like this:
For this pattern it is very important to line the triangles up exactly in the center of the previous block. This is what gives the trail that curved illusion. To make sure my triangles were lined up I centered the point of my triangle with the center seam.
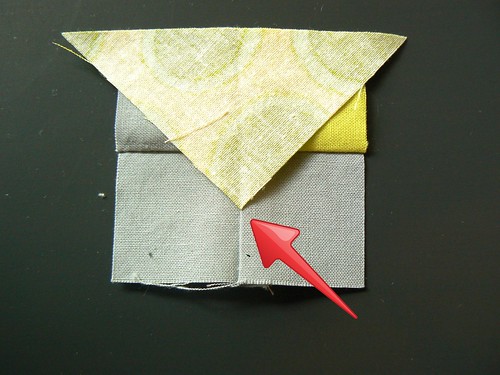
The other crucial thing to remember is to make sure you have a truly accurate 1/4" seam. To sew on the next triangle in the round (grey), rotate the piece a quarter turn to the left.
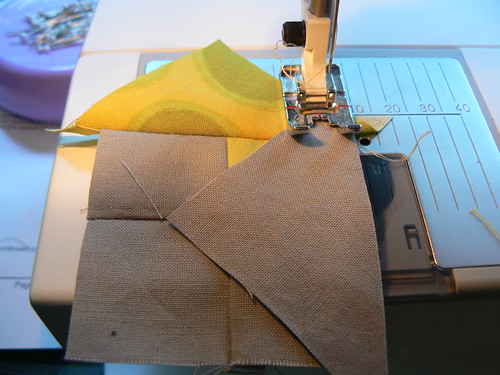
Continue rotating and sewing the other two grey triangles on in the same manner.
Trim your block to just shy of 3 1/2". I believe mine measured 3 3/8". This step is important because you want your next round to have exact 1/4" seams so that the points of the first round are flush with the next round. This preciseness is what gives the block the illusion of turning. It makes the "trail" curve.
Round 2:
Again you want to make sure that your next colored triangle is sewn to the "top" of your block. The top rotates with every round. To ensure you're at the top, make sure the last colored triangle is at the top right of the block.
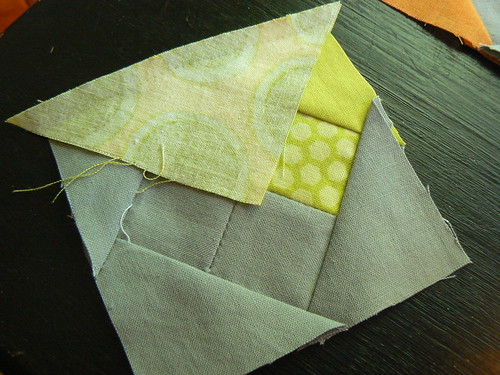
Remember to make sure that the point of your next triangle is centered on the square below. This is a bit trickier since there is no center seam at this point. I just sort of eyeballed it to align it in the center of the first square.

Continue sewing the grey triangles as you did in the previous round. Trim square.
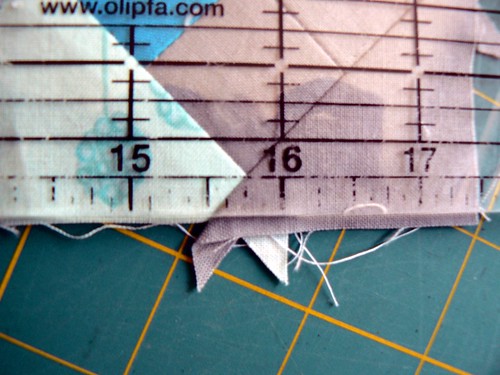
To trim the last two rounds I lined up the 1/4" mark on my ruler with the point of the round and trimmed.
The next two rounds are the same, sewing the triangles starting at the top and continuing counter-
clockwise.
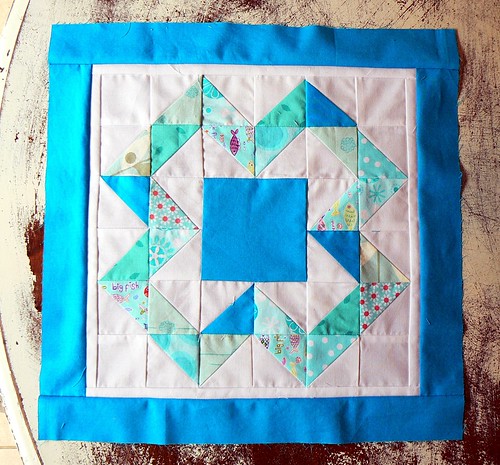
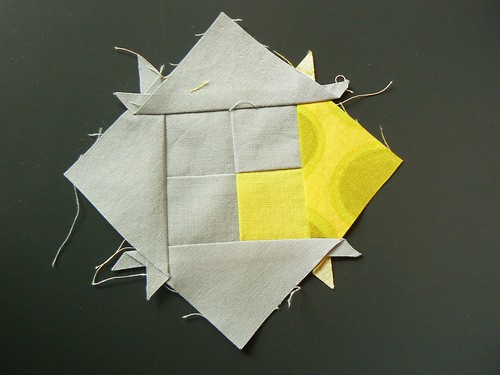
Trim to 8 1/2" square and you're done!
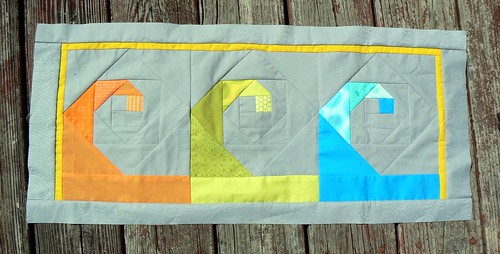
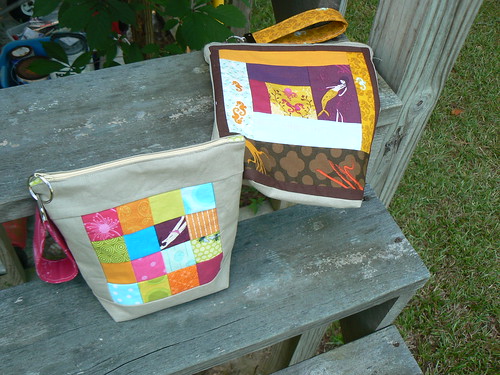
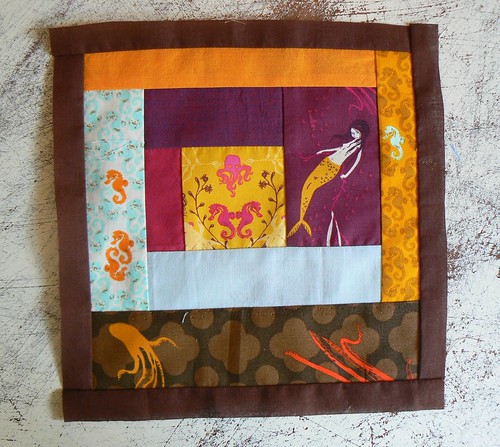
To make my block for the Quiltcon Challenge I added a rectangle to the bottom of each of my Snail's Trail squares to make more of a "wave" than a traditional Snail's Trail. My rectangle was 2 1/4" by 8 1/2".
I think that this "wave" version of the Snail's Trail would be an excellent border for a quilt. I have a few projects in mind that use this technique. If you make your own version please share! I would love to see what other great minds come up with.
Let me know if I've made any mistakes or if anything is unclear. This is my first tutorial. I've never done it before and I won't learn if no one points out my errors. Thanks!