Sunday, July 29, 2012

Snail's Trail Tutorial


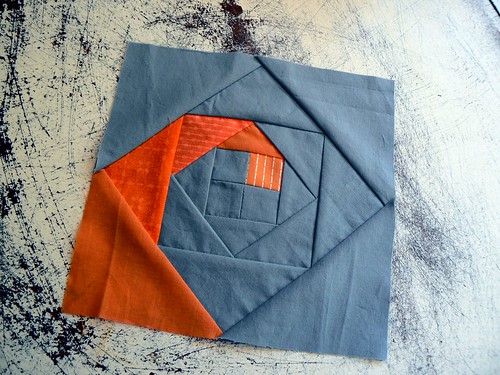
Warning:  This is my first tutorial.  Ever.  Please let me know if you find any errors or have suggestions or comments.  These instructions make one 8 1/2" square. 

Snail's Trail


P1060093

Materials:

Small scraps for the colored swirl
1/4 yard of grey

Cut:

Inner Squares ~ 1 1/2"  {cut 1 orange and 3 grey}
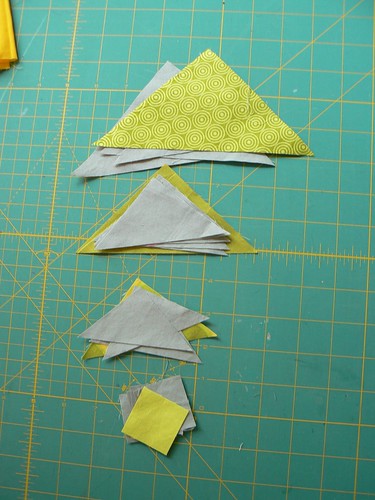
Round One ~ {cut 1 orange and 2 grey squares 2 1/2 "}
Round Two ~ {cut 1 orange and 2 grey squares 3"}
Round Three ~ { cut 1 orange and 2 grey squares 4"}
Round Four ~ {cut 1 orange and 2 grey squares 5"}

For round one through four squares cut each square in half to make half-square triangles.  Do not cut the four 1 1/2" inner squares.  You will end up with one extra (insert your color here) and grey triangle.


Snail's Trail

All seams are 1/4".
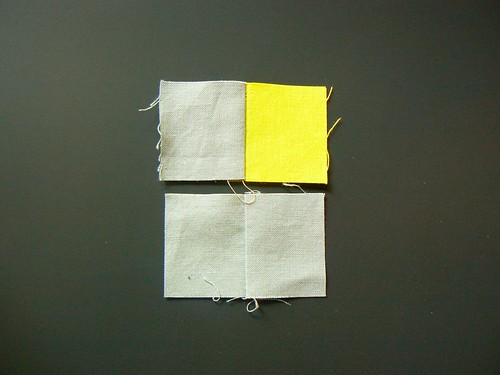
Start by sewing one orange square and one grey square together.  Then sew two grey squares together.  Press seams to one side and pin sets together.  *Note: this is really the only time I pinned anything on this block.  Feel free to place pins to your heart's content but I didn't find it necessary.*

Snail's Trail


Snail's Trail

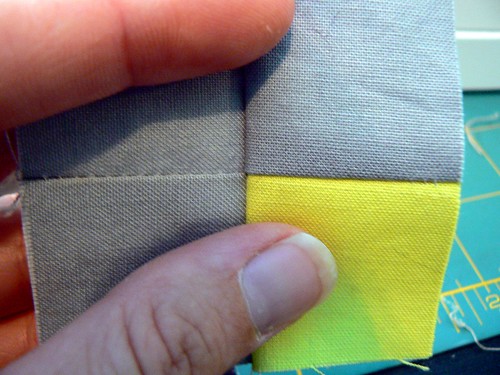
To get the center seam perfectly aligned (usually) I iron the seams to opposite sides and line up the center seam like so:


Then I rub my forefinger and thumb together until the seams sort of "click". 


I end up with this:


Round 1:

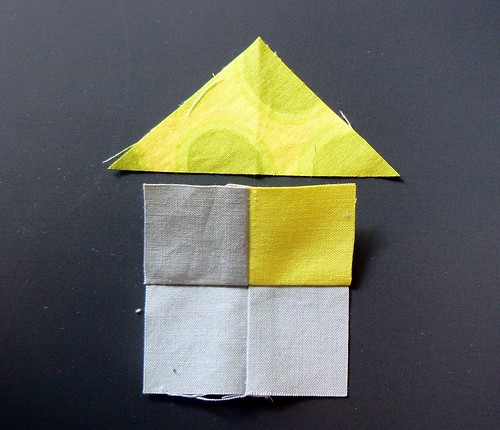
Begin by sewing the first (smallest) colored triangle onto the top of the 4 x 4 square.  The top contains the colored square (green in my case), which is on the right.

So your first triangle of round 1 should look like this:

Snail's Trail


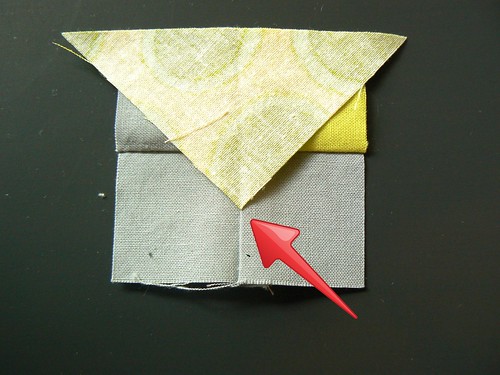
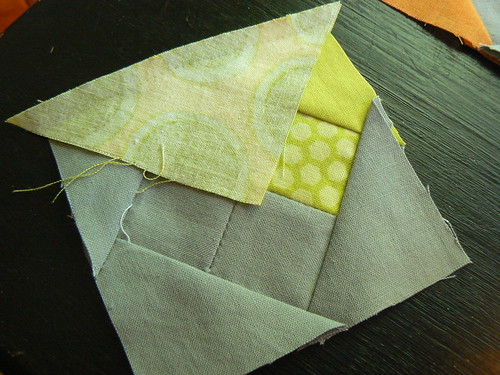
For this pattern it is very important to line the triangles up exactly in the center of the previous block.  This is what gives the trail that curved illusion.  To make sure my triangles were lined up I  centered the point of my triangle with the center seam.


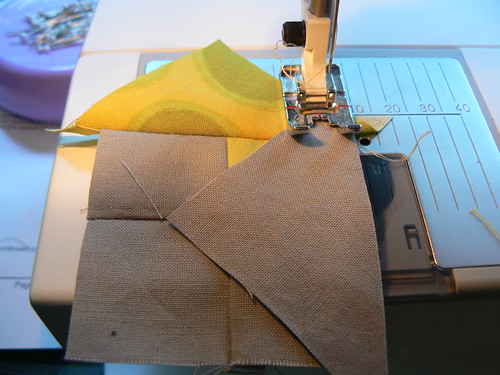
The other crucial thing to remember is to make sure you have a truly accurate 1/4" seam.  To sew on the next triangle in the round (grey), rotate the piece a quarter turn to the left.


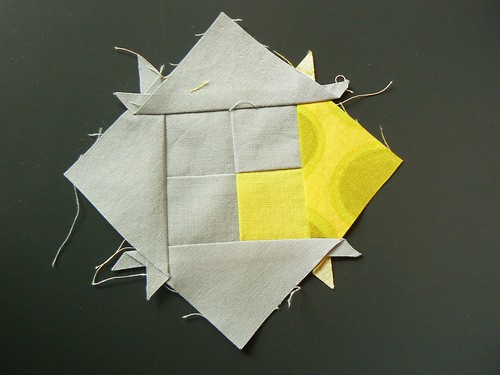
Continue rotating and sewing the other two grey triangles on in the same manner.


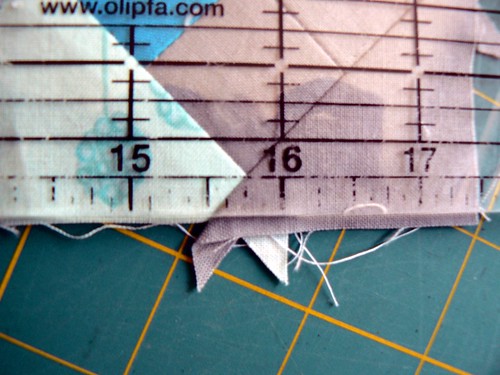
Trim your block to just shy of 3 1/2".  I believe mine measured 3 3/8".  This step is important because you want your next round to have exact 1/4" seams so that the points of the first round are flush with the next round.  This preciseness is what gives the block the illusion of turning.  It makes the "trail" curve.

Round 2:

Again you want to make sure that your next colored triangle is sewn to the "top" of your block.  The top rotates with every round.  To ensure you're at the top, make sure the last colored triangle is at the top right of the block.


Remember to make sure that the point of your next triangle is centered on the square below.  This is a bit trickier since there is no center seam at this point.  I just sort of eyeballed it to align it in the center of the first square.


P1060098
Continue sewing the grey triangles as you did in the previous round. Trim square.

To trim the last two rounds I lined up the 1/4" mark on my ruler with the point of the round and trimmed.

P1060108

The next two rounds are the same, sewing the triangles starting at the top and continuing counter-
clockwise.


Trim to 8 1/2" square and you're done!

P1060093

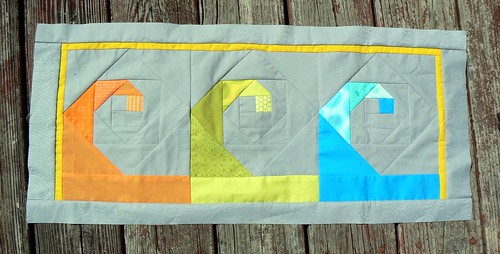
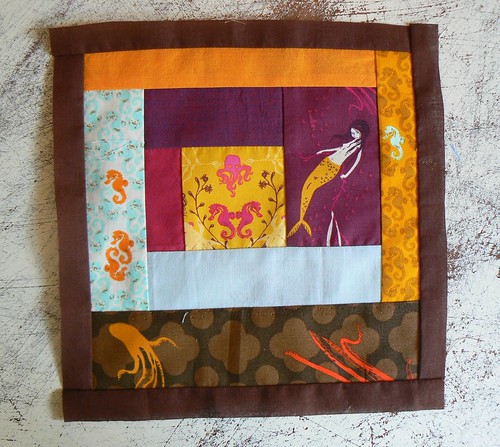
To make my block for the Quiltcon Challenge I added a rectangle to the bottom of each of my Snail's Trail squares to make more of a "wave" than a traditional Snail's Trail.  My rectangle was 2 1/4" by 8 1/2".

I think that this "wave" version of the Snail's Trail would be an excellent border for a quilt.  I have a few projects in mind that use this technique.  If you make your own version please share!  I would love to see what other great minds come up with.  

Let me know if I've made any mistakes or if anything is unclear.   This is my first tutorial.  I've never done it before and I won't learn if no one points out my errors.  Thanks!

~A

Tuesday, July 24, 2012

Modern Quilting

In early June the Modern Quilt Guild asked for submissions for their Quiltcon challenge.  After a little thought, a lot of shopping and some procrastination I finally finished my first entry.  I settled on a modern take of the traditional Snail's Trail block.

Quiltcon Challenge

To me this juxtaposition of modern and traditional is the very definition of modern quilting.  Modern quilting isn't about creating a whole new craft out of thin air.  It's about taking traditional methods and bringing them into the 21st century.  It's about building on the techniques and patterns established by creative women {and men} who came before us.  And throwing a few new things in there too.

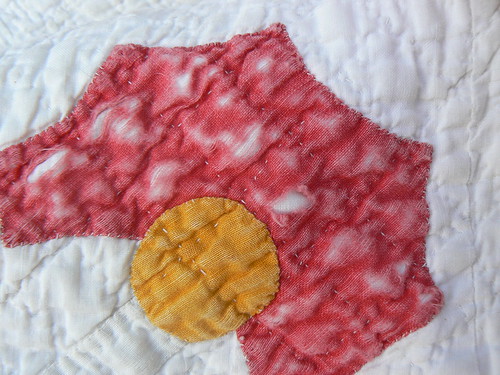
Sometimes I feel like modern quiltists are dismissing traditional quilting as "old-fashioned" or "out of date" or just not relevant.  I think that's missing the whole point.  When I quilt or sew, I feel a kinship with the women around me who are also busy designing and stitching away.  I'm not just inspired by the popular bloggers around today, the most recognizable up and coming fabric designers or even my wonderful crafty friends.  Although these women are terrific sources of daily inspiration and encouragement, I'm also inspired by the woman who hand stitched the quilting on my red and white, Civil War era floral quilt.  The stitches are tiny!  The quilting is done in a 1/2" grid pattern over the entire quilt.  BY HAND!!  It's amazing.  The thought that it was probably done by candlelight after all 18 children were in bed makes it even more amazing. 

 P1060125


So, what I'm saying is that the Modern Quilt movement is magnificent, but we should also remember the legacy of past quilts and quilters.  They are truly a gift and in their time, they were the modern ones.

~A

Wednesday, July 18, 2012

Done

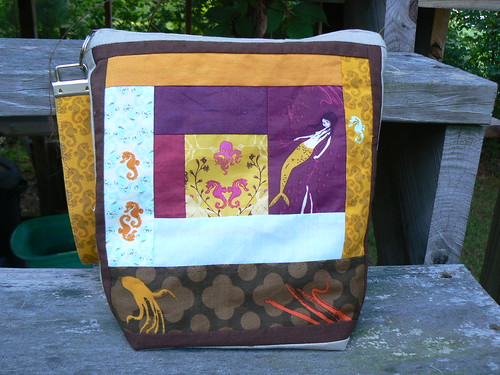
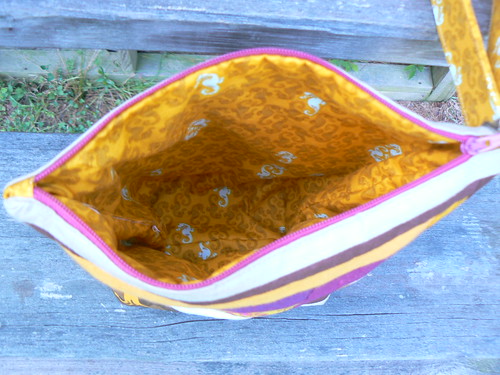
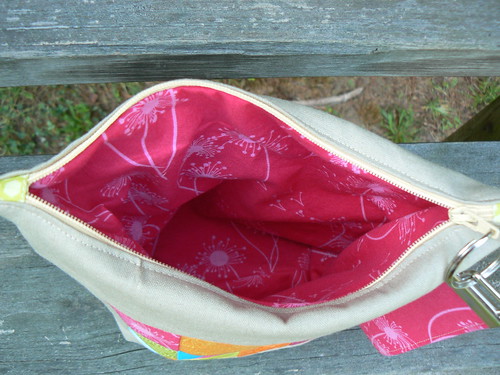
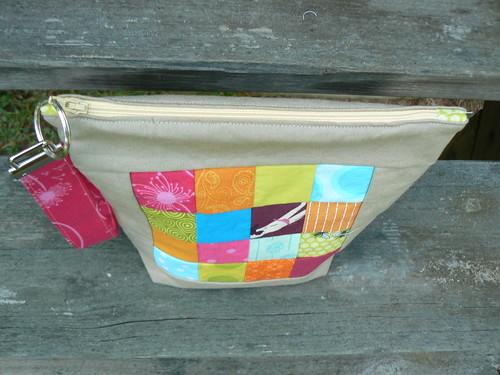
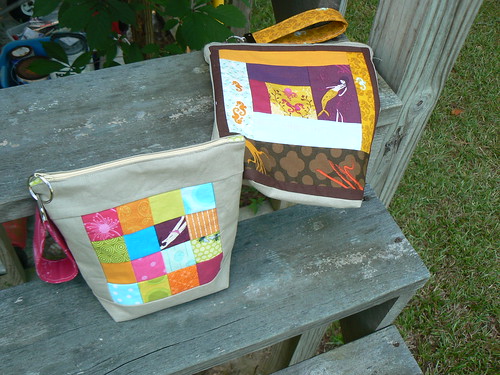
Let me just say, these little bags were hard to let go.  I had fun making them and I love the way they turned out.  I did not get them made before the birthdays they were for but I did finally get them in the mail yesterday.  Just a few days late!  The went out to be loved and adored or at least used. 

Perfect Zip Bags

The pattern was wonderful.  I'm usually hesitant to buy bag patterns because I like drafting my own but Elizabeth Hartman's pattern was well worth the splurge.  They were easy to make and went together really quickly {when I didn't have a 2-year old "helping" that is}. 

Perfect Zip Bags

Perfect Zip Bags

Perfect Zip BagsPerfect Zip Bags


Perfect Zip Bags

Perfect Zip Bags

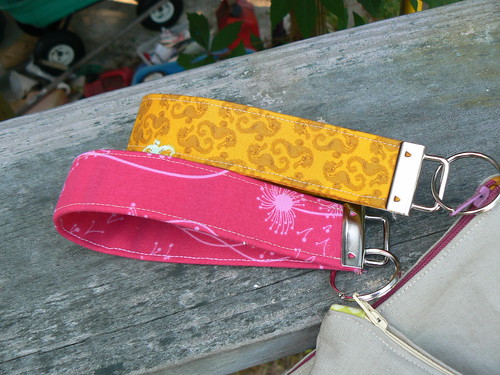
To make the handles, I deviated from the pattern and used a key fob set that I picked up at my local quilt shop.  I took literally five minutes to make each handle and they look so, professional. 

Perfect Zip Bags


I really love both bags.  The Mendocino log cabin is definitely more "me" but the brighter 16-patch is so happy.  I'll have to make some just for me now.  And everyone else of course! 

Perfect Zip Bags

Tomorrow I'll have a peak at the next project for you.

~A

Wednesday, July 11, 2012

Mendocino and Birthdays

I finally did it.  I cut some of my Mendocino fabric.  It was a little nerve wracking, but not as much as I thought.  The fact that it was for someone wonderful helped a lot.  I made some plans last night for a couple of last minute birthday gifts for two of my favorite people.  Their birthdays are two days apart, the first is this Friday and the other is this Sunday.  {Of course} I decided last night to make gifts to send 700 or so miles away.  I'm making the Perfect Zip Bags from Oh Fransson!  I finished piecing the first patchwork block this morning and  I should be able to finish both bags by tonight.  Since the two lovely ladies live close to each other, I really want both bags to go in the mail at the same time.  With any luck I'll get them out tomorrow morning first thing and they'll have them on Saturday.  Right in between their respective birthdays. 

I thought about drafting my own pattern but there are already so many good ones out there and realistically, I don't have time to perfect a pattern in one night.  Besides, I really love Oh Fransson's! {Elizabeth Hartman's} bags.  

So what do you think of the first round of patchwork?  Me?  I'm in love.  

P1060075

I'll be sure to take pictures before I put the bags in the mail.  

~A

Tuesday, July 10, 2012

July Block


P1060070
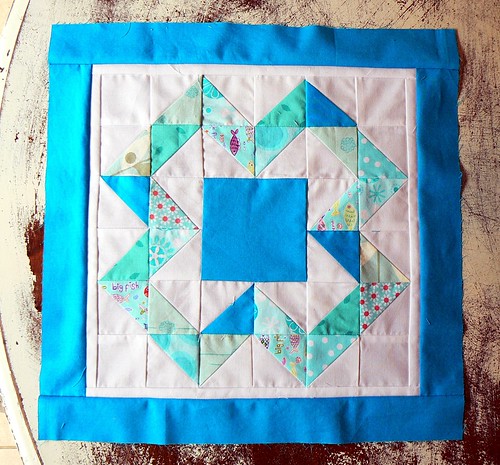
I recently join the Cheer Circle of do. Good Stitches started by Rachel and my first assignment was this block in blues.  The block is from a tutorial by Jess over at SewCraftyJess.  You should check out the baby quilt she made!


 I've never been in a bee before and I'm very excited!  I'm always awed by the talent, dedication and good will of the women in these circles and I am honored to be a part of such a wonderful group. I can't wait to see what other blocks I get to make {and share} this year. 

Sunday, July 8, 2012

It Worked!!

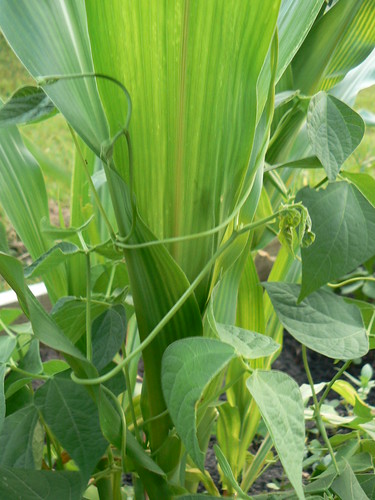
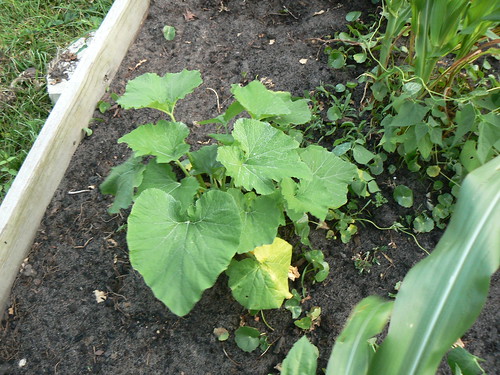
This year I tried something different in the garden.  I planted a "Three Sisters Garden" in one of my beds.  A Three Sisters Garden is basically just a patch of corn, beans and squash planted together.  I've been interested in companion planting for a few years now but haven't put much effort into it.  The idea with the corn, beans and squash is that the nitrogen-fixing beans will feed the nitrogen-loving corn and the corn provides "poles" for the beans to climb.  The squash acts like a mulch to keep weeds down.  I was skeptical that it would work.  Not that a Three Sisters Garden would work but that it would work for me.  

When I went out to weed last night I found this:


Garden 2012


It worked!  My beans, corn and squash all look great and the beans are actually climbing the corn!  I know that it probably makes me a big nerd but I am so excited!


P1060027


P1060023

 In other news, my tomatoes are sad.  Tomatoes have been the bane of my gardening existence for the past three years.  I think I have wilt.  Which goes away after something like 20 years.  {It's actually 3-5}.  This year several large, strong looking tomato plants sprung up in the garden on their own.  I'm fairly positive that the seeds were in the compost that I spread from my compost pile.  We've harvested tons of tomatoes so far and I thought that either: 1) The tomatoes came from a wilt resistant line or 2) I don't really have wilt, something else killed murdered assassinated my tomato plants.  Now many of the plants are dead or dying and I'm stumped again.  Now I think I may have a pest in the soil.  I may send one of the plants off with a soil sample to the state extension office.  Maybe they can tell me what's going on.  

I haven't been stitching much this week.  I've been planning lots though.  I'm working on my very first tutorial.  I'm very excited to share that with you next week.  It happened while I was working on Christmas gifts.  I also joined a charity quilting bee.  Another first!  I have several other projects in various stages of planning.  I have a feeling the rest of  my summer will be filled to the brim.  Hopefully that means I'll have lots to share.

P1060028